Monday, May 11, 2015

Fauxidermy - White Deer Head

I purchsed this white, resin deer head from Z Gallerie - three years ago!  And I'm just now putting it up. But there's a reason for that...


Z Gallerie sells this pretty fauxidermy pieces in different sizes.  I purchsed the smaller deer head. It measures 15.75''W x 7.75''D x 17.75''H. 


It's a decent size, but I thought it looked puny on the two walls I had in mind for it. So, there it sat, in my living room, for three years! Everytime I walked by, it looked at me, begging to be put up. 


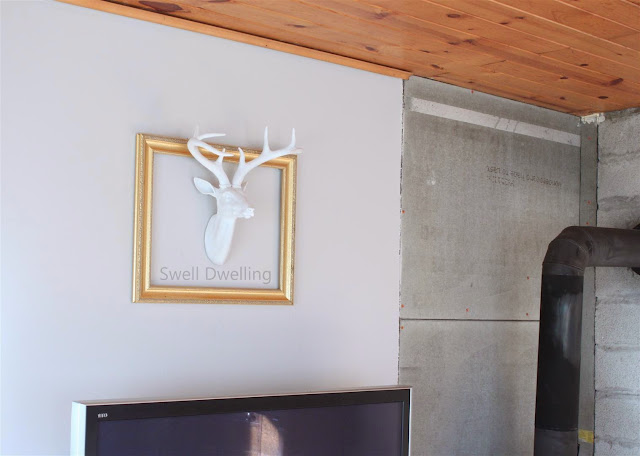
Then I had an idea. That happens sometimes. I found this gold frame in one of my sheds. My mom had purchased it years ago and never used it. See, buying decor and not using it is obviously a genetic trait. Thanks, Mom!  


The deer head + frame visually take up more space than just the deer head alone. And the gold adds a little bit of shine to the area. 


I was amazed to see that this deer head is still available for purchase. Click here to view it on Z Gallerie's website.  I don't receive any compensation for providing this link. I'm just being helpful.   


Z Gallerie also sells other fauxidermy pieces. If I didn't have such a small house, I'd buy them all!  

Tuesday, July 8, 2014

How to make Hummingbird Nectar


Hummingbirds are one of my favorite animals. I love the sound they make when the zoom off into the trees and they have such beautiful coloring. 

It seems that as quickly as I can fill up my feeders, they're empty again.  In summer, making batches of hummingbird nectar turns into a part-time job for me.  It's one I gladly accept.


Making the nectar is quite easy.

1 part sugar -- 4 parts water
1/4 cup of sugar -- 1 cup of water
1/2 cup of sugar -- 2 cups of water
3/4 cups of sugar -- 3 cups of water
1 cup of sugar -- 4 cups of water

Make sure you use plain, table sugar. Honey and other sweeteners can be dangerous to hummingbirds.

Combine the sugar and water in a pot and heat on the stove until the sugar is dissolved. Let cool and fill your feeders. 

No food coloring is necessary.  I try to avoid it in what I consume and wouldn't dare give it to my little bird friends.  The red of the feeder is enough to attract them. 


Sit back and enjoy the show!  

Sunday, July 6, 2014

Eucalyptus Wood Floors

The biggest house project we've tackled to date is installing eucalyptus wood floors in most of the home. We've done laminate and vinyl in previous homes, but installing wood was a first for both of us. 


Luckily, the flooring we picked is a floating, click-and-lock system -- not so different from the laminate we'd installed before. 

It is available in two finishes - natural and mocha. While I love both and have been dreaming of dark wood floors for years, I knew that light floors were the way to go in our house. We have dark wood ceilings and needed something light on the floors to lighten and brighten the spaces.


This is the 'natural' finish of eucalyptus flooring from Cali Bamboo. 


We put down felt underlayment and then clicked and locked the pieces into place. We are by no means professionals. If we can do it, so can you! 


It's Janka tested to 3500+ lbs. That means it holds up really well to denting and wear. Brazilian cherry is about 2350 and southern yellow pine is about 690, for comparison. 

We have two terriers (read: crazy terrors that are constantly running around the house) and have not noticed any scratching.  It's advertised as pet and high-heel friendly and comes with a 50-year residential warranty. 


I also love that eucalyptus is a sustainable product. It's fast-growing and can be harvested unobtrusively every 14 years. 


We still need baseboards and area rugs, but it feels so great to get out of bed in the morning to a nice, new, clean floor.  


I'm linking this post to:  A Stroll Thru Life

Thursday, January 2, 2014

Wood Ceilings + White Cabinets Inspiration

I have a love-hate relationship with the dark wood ceilings in my house. My house isn't big and I sometimes feel as though the darkness of the ceilings soaks up any little bit of light that enters the room.

I've thought about painting the ceilings white. Or covering them with tin ceiling tiles, painted white, of course. Maybe installing white bead-board or drywall over the wood is the solution?

But then there's a teeny-tiny part of me that likes them. There's a certain amount of charm that comes with wood ceilings. They fit the style of this house.

One option would be to paint my kitchen cabinets white. Hmm... seriously considering it.


I'm hoping that white cabinets will contrast nicely with the wood ceilings and brighten up the kitchen.


Here are a few of my inspiration photos containing wood ceilings and white cabinets:


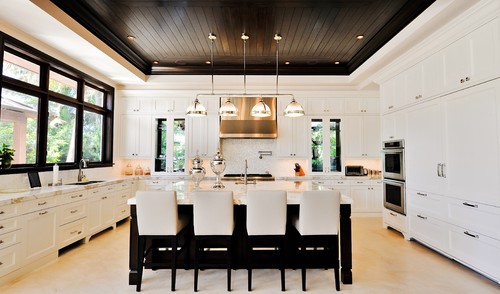
I love this one!  The high ceilings and natural light keep it light and bright.


All the materials in this kitchen work well together to achieve an airy feel.


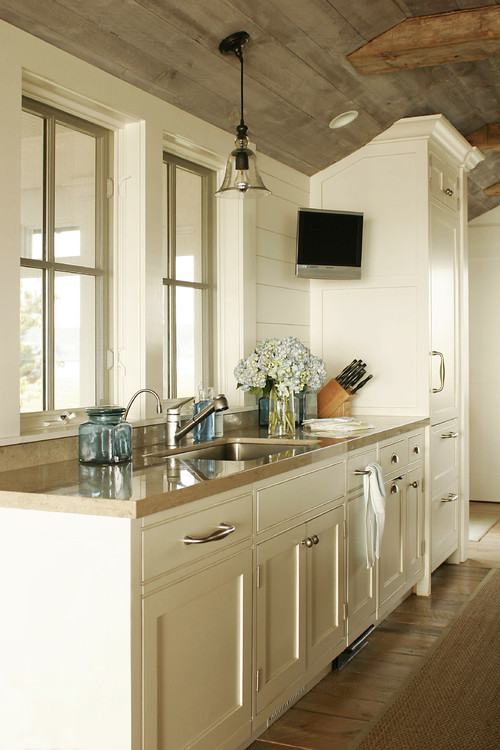
A more rustic look, but it still works! I can see myself washing dishes here. 


The dark ceiling really pops against the wall of white.


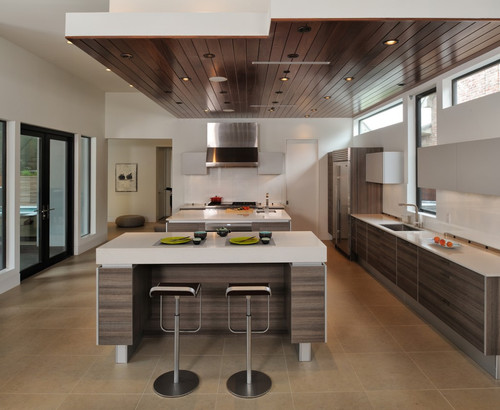
This kitchen doesn't have white cabinets, but it does show that even with a lowered ceiling it doesn't have to be dark and cave-like.


Most of the top cabinets are painted white while the bottom cabinets are stained. Sometimes it just takes a little bit of white to keep a space from becoming overloaded with wood.


Monday, April 1, 2013

Coffee and candle

Last year, hubby said he wanted to start drinking coffee. I can't drink it because caffeine makes me feel horrible, but I do love the smell of coffee. It reminds me of mornings when I was a kid. My mom always ground whole beans to make coffee and I usually awoke to the smell of dark-roast coffee brewing. It's one of those comforting aromas for me. 

I was excited to live vicariously through my hubby. It's only fair since he's allergic to gluten and has to watch me eat all kinds of yummy bread. What's up with the allergies in this household? 

Anyway, after buying a bag of coffee beans, hubby had a couple cups of coffee and determined that while he likes the way it smells, he doesn't care for the taste. Darn. 


Last week I was cleaning out one of our kitchen cabinets and came across the unused coffee beans. I was about to toss them since they're now a year old and will never be used in our house. Then I had an aha! moment. 

Why not fill my glass hurricane with the coffee beans, set an unscented candle in it, and enjoy the aroma of coffee without having to drink any? 


I'm not a huge fan of scented candles, so this is perfect. The coffee scent is subtle, even when the candle is not burning.

Friday, March 29, 2013

How to make a template to hang artwork

I'm finally getting around to hanging some art in our house. It's about time - we've been here just over a year! I always procrastinate on hanging art and I don't know why. It makes such a big difference in the way a room looks and feels.

Hanging art, especially groupings of art, is not something I enjoy. Who does? Usually I make my husband hold art  in several different places so I can visualize what it will look like. Left a little, up a little, back down a little. Anyone that's ever done the holding knows the my-arms-are-about-to-fall-off feeling. 


I really like those fancy templates you can buy that help you space and hang your art. Since I'm on a budget, I thought I'd make my own. By using a template, I was able to easily visualize how these would look on my wall before putting multiple nail holes in my wall and I did it all by myself without torturing my husband. 


First, I put my art on a piece of newspaper. 


Then I cut around the frame so that the piece of newspaper was the size of my frame-less art. Since I'm hanging two pieces of art of the same size, I simply cut a second template from the first.


Tuesday, December 18, 2012

Painting Tongue and Groove Pine

I know that painting over wood can be a topic of debate for many people. There are purists that will tell you to never paint over any wood, ever! Then there are people that will tell you to paint anything and everything.  

I probably fall somewhere in the middle. If I lived in a historic home with original woodwork, I would probably leave it as it. But I don't. And that's why I painted this wall white:


I did take before and in-progress photos, but I seemed to have deleted them all. Oops! Here's a little photo of what the wood looked like before.


It's the real-deal tongue and groove pine. There's a whole lot of wood going on in this tiny house and they're all different types and colors of wood.  Yellow pine, gray barn wood, dark ceilings, cherry stained cabinets, etc. It's a very busy look for a very small house. 

Time to brighten and simplify this space. Paint to the rescue! 

First, wipe down the wood. You want a clean surface to start with. You could lightly sand, but I didn't. My wood is pretty smooth.